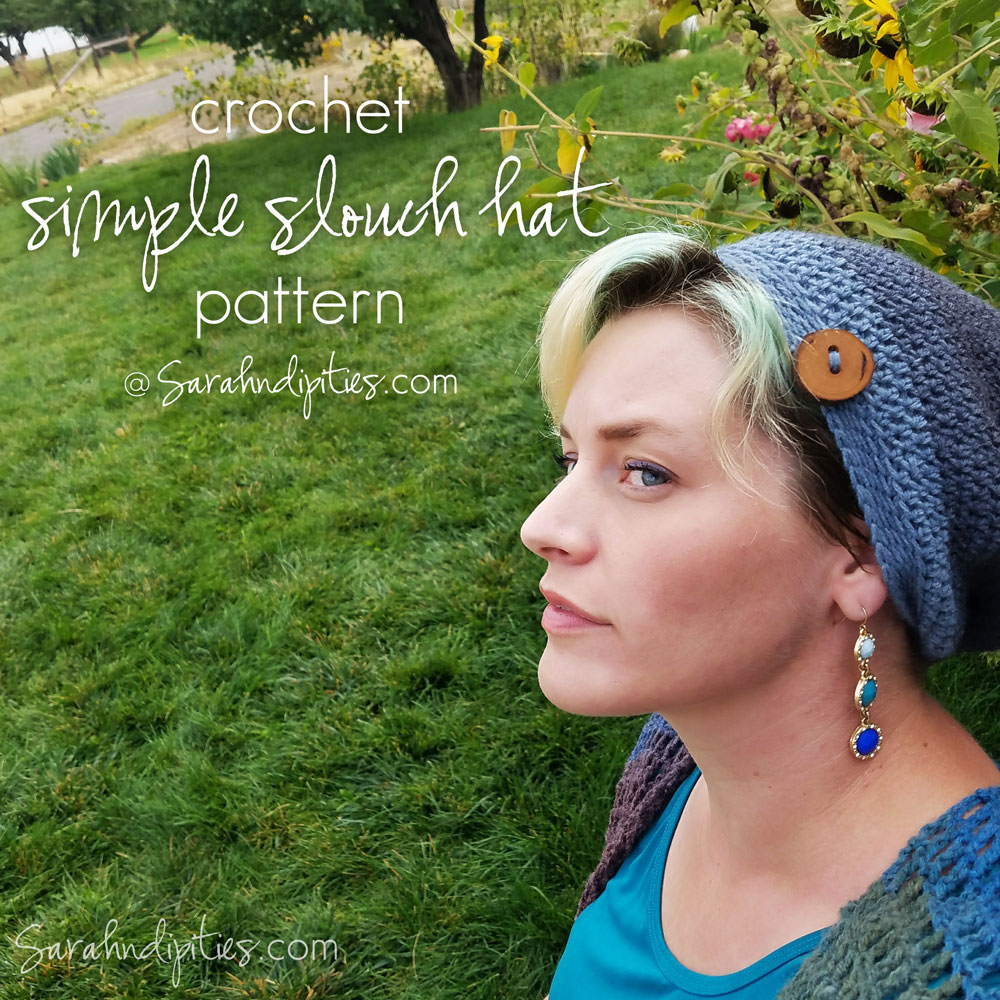
Things to Make: Simple Slouch Hat
.jpg)
Today, September 15th, is officially "MAKE-A-HAT DAY!" I bet you didn't know there wan such a thing, huh?
Well, in honor of the occasion, I decided to write up a quick and simple Crochet Slouch hat pattern for you to try!
This pattern uses weight 3 yarn, or light/sport weight yarn. For my hat I used Lion Brand Mandala yarn in Genie. The hat is worked in the round, so there won't be any turning on rows. Also, the pattern in written in Standard US terms.
SUPPLIES NEEDED:
About 1/3 skein of Lion Brand Mandala yarn (or any light sport/ #3 weight yarn) My example uses Genie.
Crochet hook size H (5 mm)
Scissors
Needle
ABBRVIATIONS:
ch = chain
sc = single crochet
hdc = half-double crochet
dc = double crochet
blo = back loops only
hdctog = half-double crochet together
beg = beginning
sl st = slip stich
st = stitch
sp(s) = spaces
rem = remaining

SIMPLE CROCHET SLOUCH HAT
Ch 4. Join w/ sl st to form a ring.
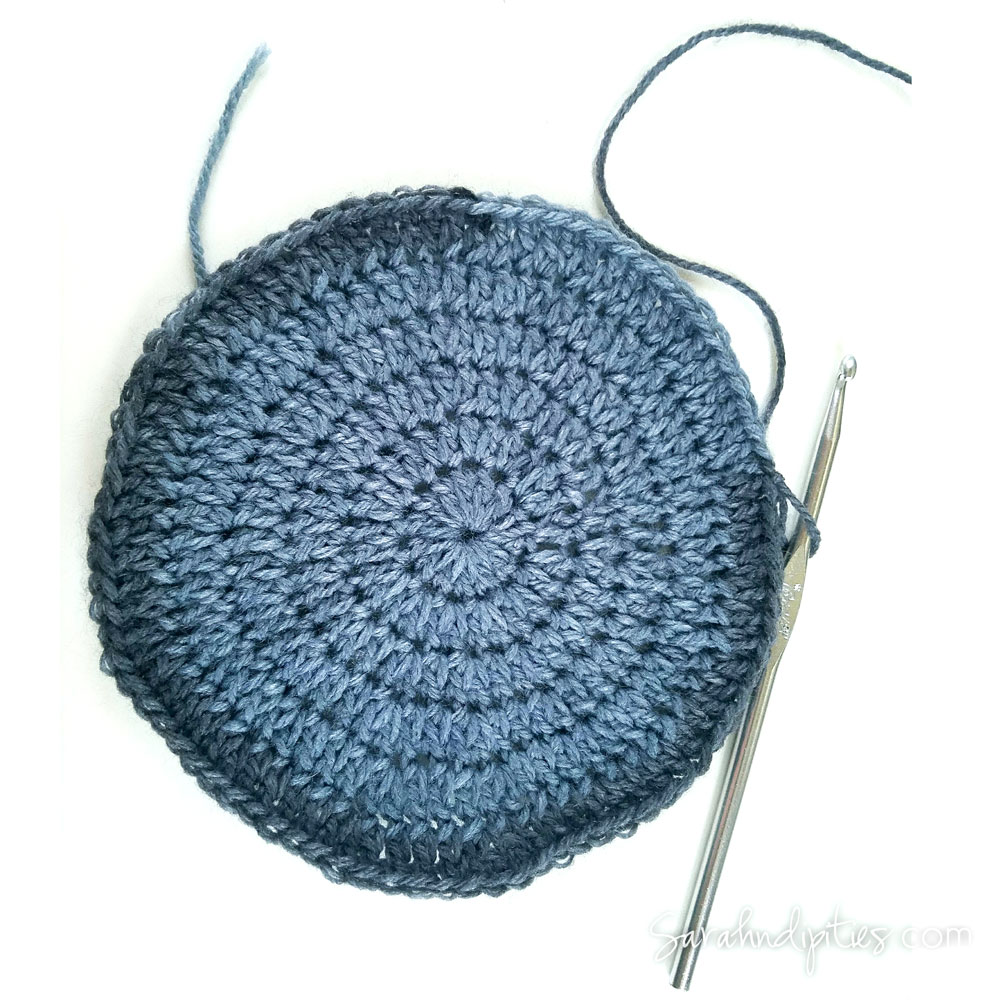
(The first 6 rows are worked in an increase. If you find the hat to be too small you can add more rows of increase, following the given pattern.)
ROW 1: Ch 2 (counts as first dc, now and throughout). Dc 13 times in ring. Join w/ sl st to 2nd ch of beg ch 2. (14 dc)
ROW 2: Ch 2, dc in same sp as beg ch 2. *2 dc in next dc.* Rep from * around. Join w/ sl st to 2nd ch of beg ch 2. (28 dc)
ROW 3: Ch 2, dc in same sp as beg ch 2. *1 dc in next dc, 2 dc in next dc.* Rep from * around. 1 dc in last dc. Join w/ sl st to 2nd ch of beg ch 2. (42 dc)
ROW 4: Ch 2, dc in same sp as beg ch 2. *1 dc in next 2 dc, 2 dc in next dc.* Rep from * around. 1 dc in next and last dc. Join w/ sl st to 2nd ch of beg ch 2. (56 dc)
ROW 5: Ch 2, dc in same sp as beg ch 2. *1 dc in next 3 dc, 2 dc in next dc.* Rep from * around. 1 dc in next 2 dc and last dc. Join w/ sl st to 2nd ch of beg ch 2. (70 dc)
ROW 6: Ch 2, dc in same sp as beg ch 2. *1 dc in next 4 dc, 2 dc in next dc.* Rep from * around. 1 dc in next 3 dc and last dc. Join w/ sl st to 2nd ch of beg ch 2. (84 dc)
Here's what mine looked like after 6 rows:
From here on, the body of the hat is worked in rounds, meaning you won't be joining with a slip stitch at the end of each row. You'll just continue going until the hat reaches the desired length. For the rest of the body of the hat we use a Half-Double crochet (Hdc). For a quick tutorial on how a hdc is made, click HERE.
ROW 7: Hdc in same sp as join. Hdc in each dc around. Do not join to beg hdc, but instead work a hdc in the top of the beg hdc.
ROW 8-16: Hdc in each hdc around.
ROW 17: *Hdctog over next 2 hdc, hdc in next 13 hdc.* Rep around 5 more times.
ROW18-20: Hdc in each hdc around.
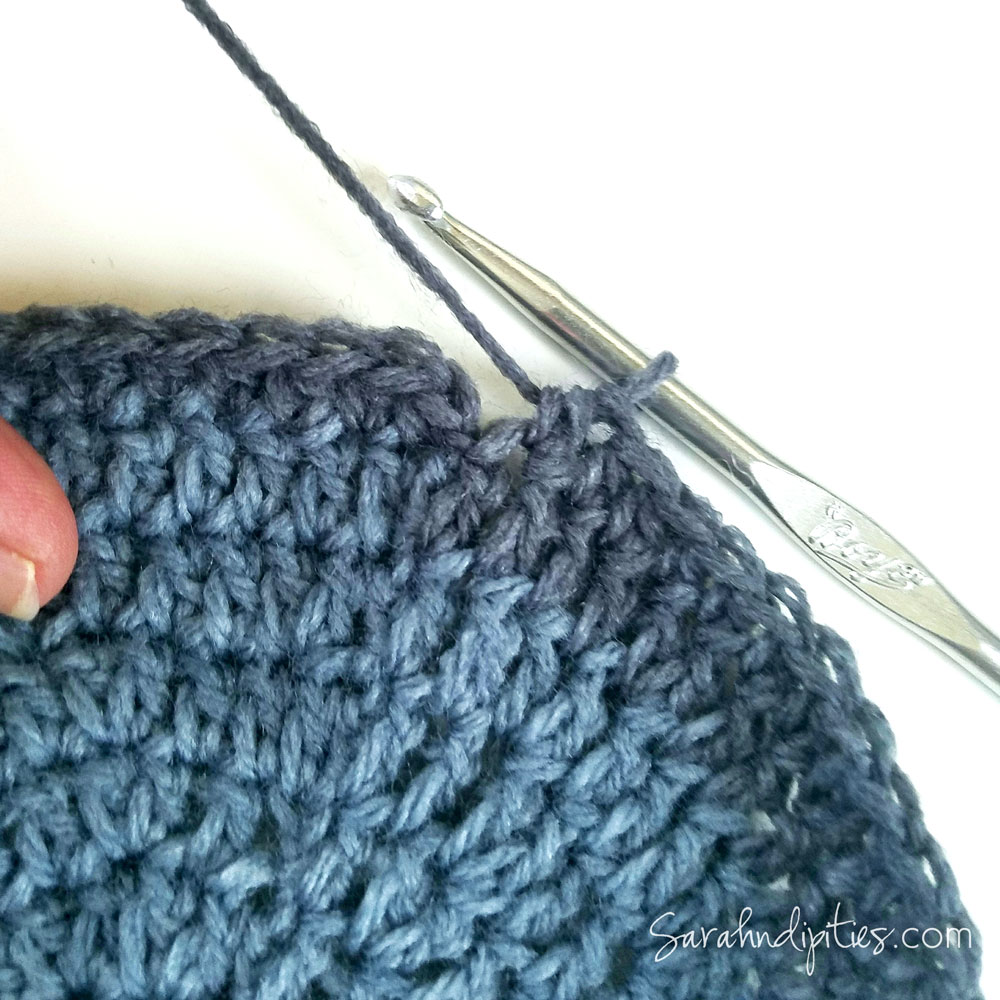
Here's mine after Row 20:

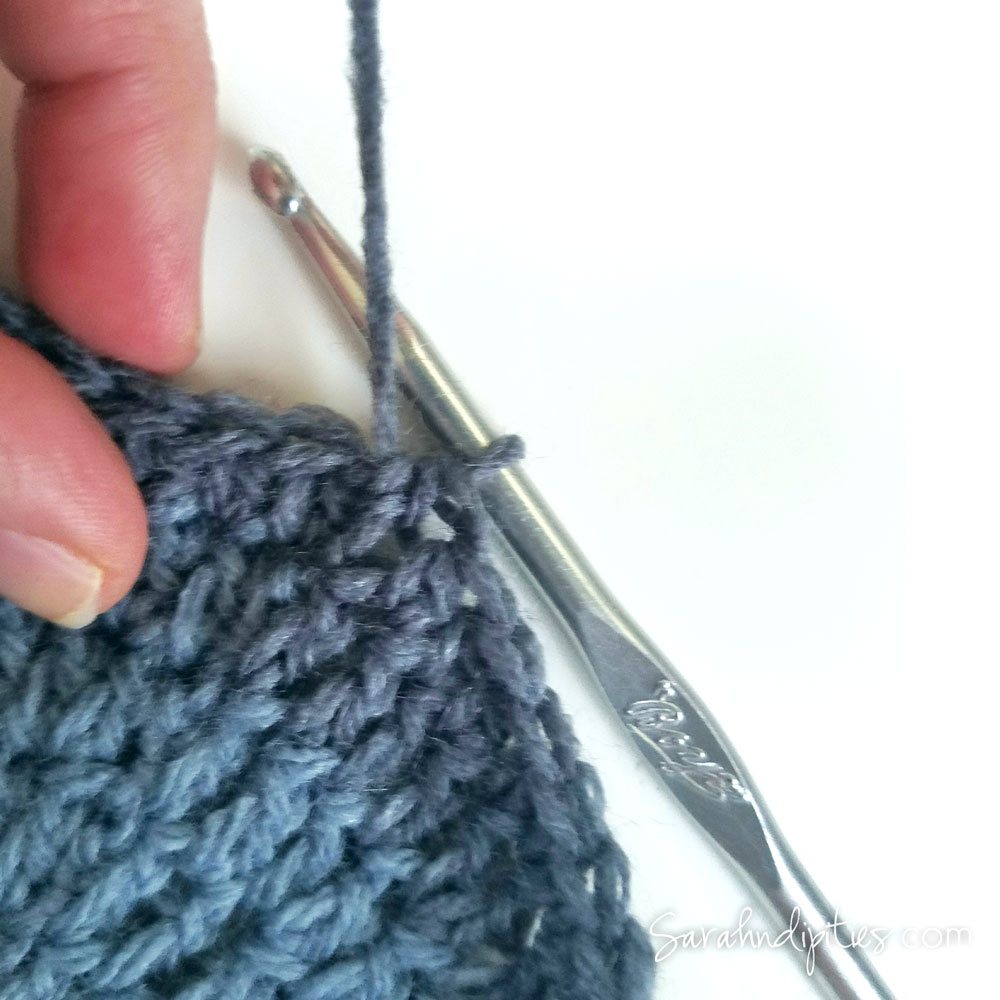
ROW 21: Sl st into next hdc. Ch1 (does not count as sc). Sc in blo (BACK LOOPS ONLY) of each hdc around. Sl st to beg sc.
ROW 22-25 (or however wide you want the brim to be): Ch 1. Sc in blo of each sc around. Sl st to beg sc.
Fasten off, leaving a long tail of yarn.

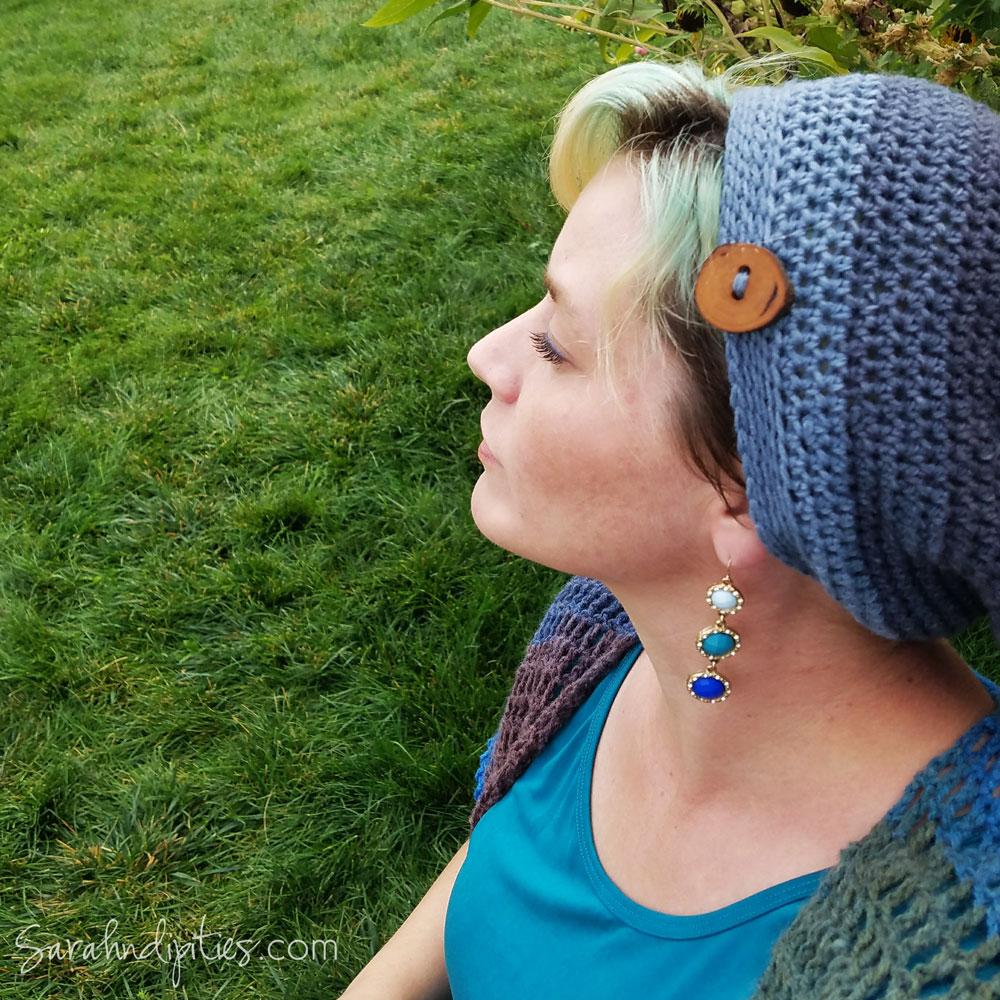
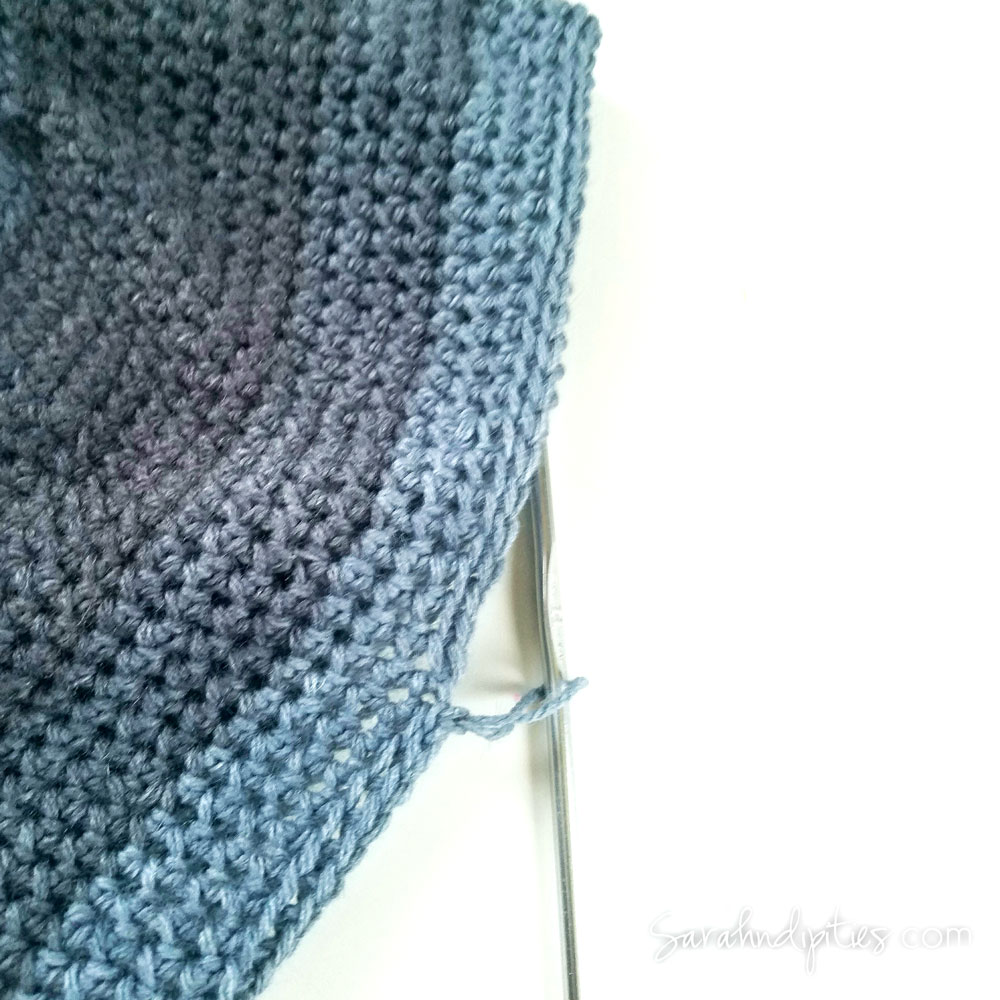
As you can see there is a seam where you have worked the brim. This is where you add your button, or other embellishment, if desired!
For mine, I chose this pretty chunky applewood button. Using the long tail of yarn, sew your button in place, fasten off, and weave in any remaining ends.

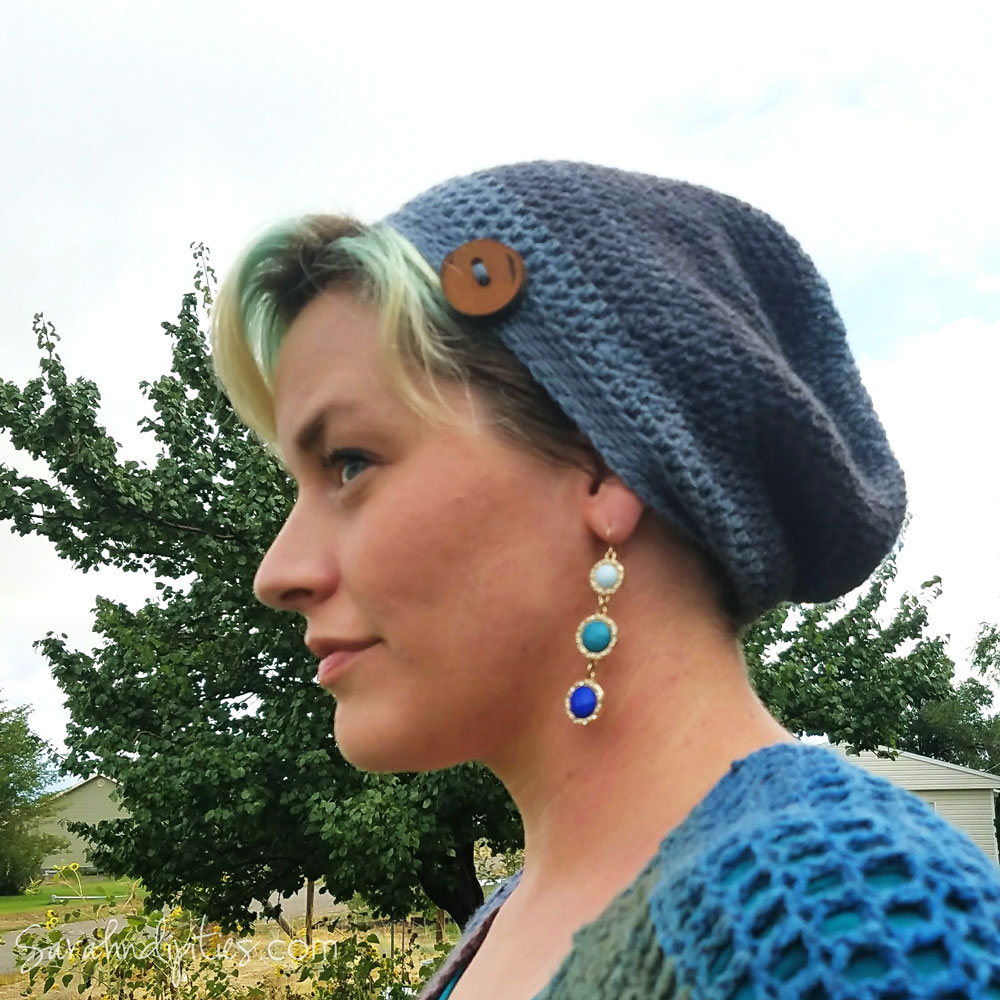
Tah-Dah!
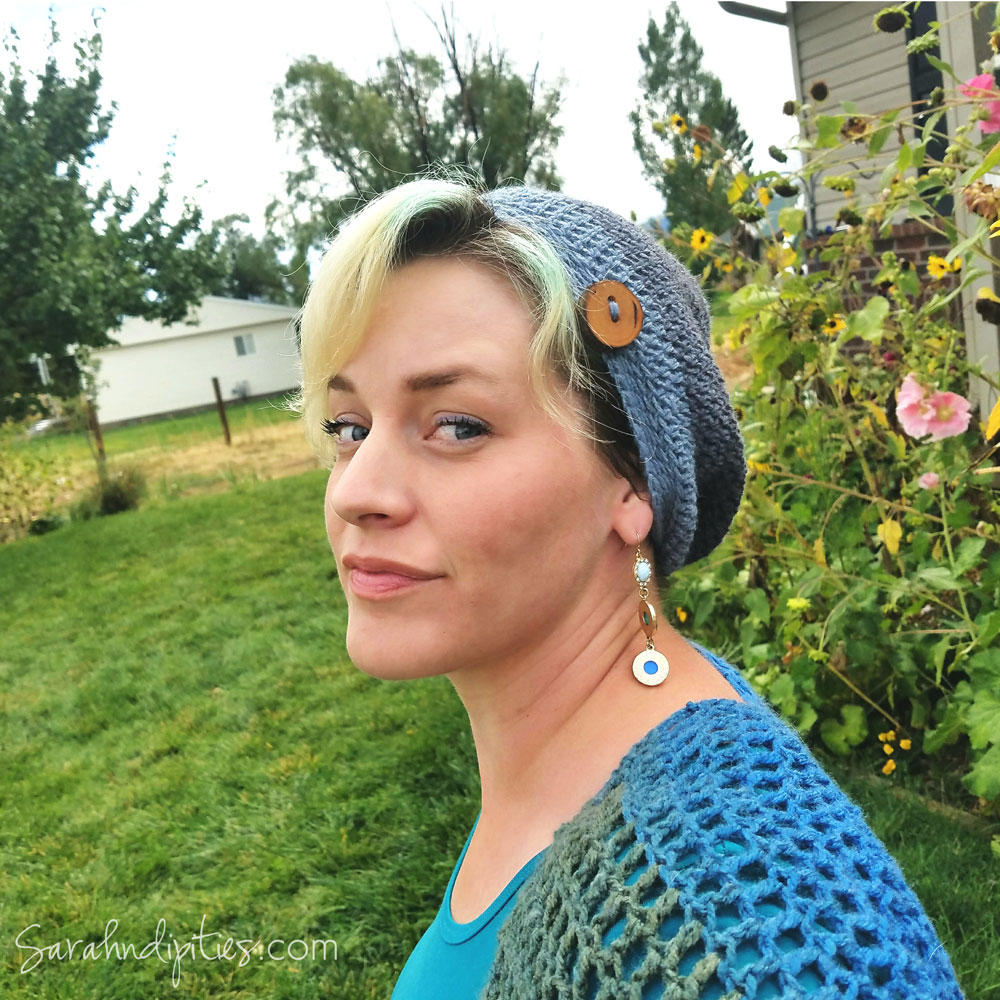
A simple, and fashionable, slouch hat in no time!
Hope you enjoy this pattern! I have some other hat patterns available to purchase in my shop, too!

Happy Make-A-Hat Day!
.jpg)


